On my.elvo.io you can create your own account without contacting Elvo:
you sign up with your email address (or a Google account), then a short
onboarding wizard collects your personal and company details and lets
you start a free trial.
Self-service sign-up exists only on my.elvo.io. White-label domains
are invite-only — an administrator creates your account there (see
section 17.1).
A self-registered account is a Partner account: the platform creates a company record for you and makes you its administrator, so you can add stations, users and drivers straight away (see section 19.2 for what the Partner tier can do).
Before you start
Have the following at hand — the wizard cannot be dismissed until its steps are complete:
- an email inbox you can open right away (the sign-in code arrives by email);
- your company’s registration details: country, VAT ID or company identifier, legal name, address;
- optionally, a password you want to use for future sign-ins.
Signing up with your email address
- Open
https://my.elvo.io. The page is titled Log in / Sign up and shows a single Email field. - Enter your email address and click Continue. The platform emails you a 4-digit code and switches the form to Enter the code sent to your email — the same step an existing account goes through (see section 18.1); nothing on the page says yet whether the address is new.
- Enter the code and click Log in. Your account is created and the onboarding wizard opens over the Dashboard.
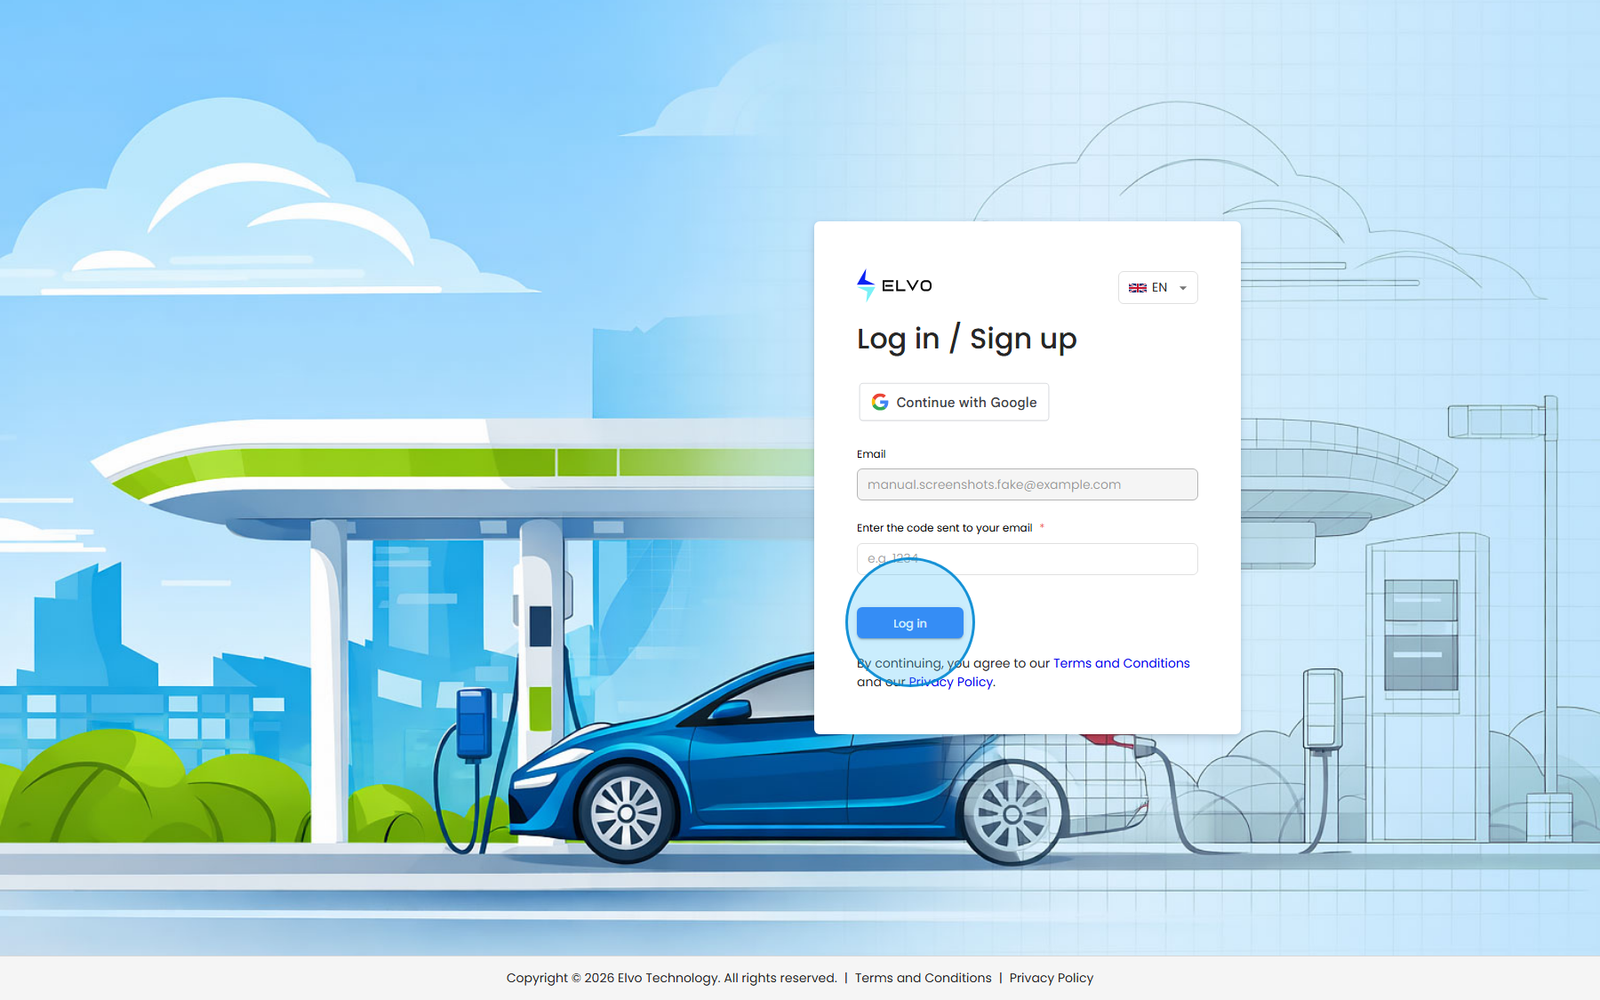
If the code does not arrive within a minute, check your spam folder, then reload the login page and enter your email again to request a new code.
Google alternative. Click Continue with Google above the email field and pick a Google account. If no platform account exists for that address, one is created on the spot and the same onboarding wizard opens (see section 19.3).
The onboarding wizard
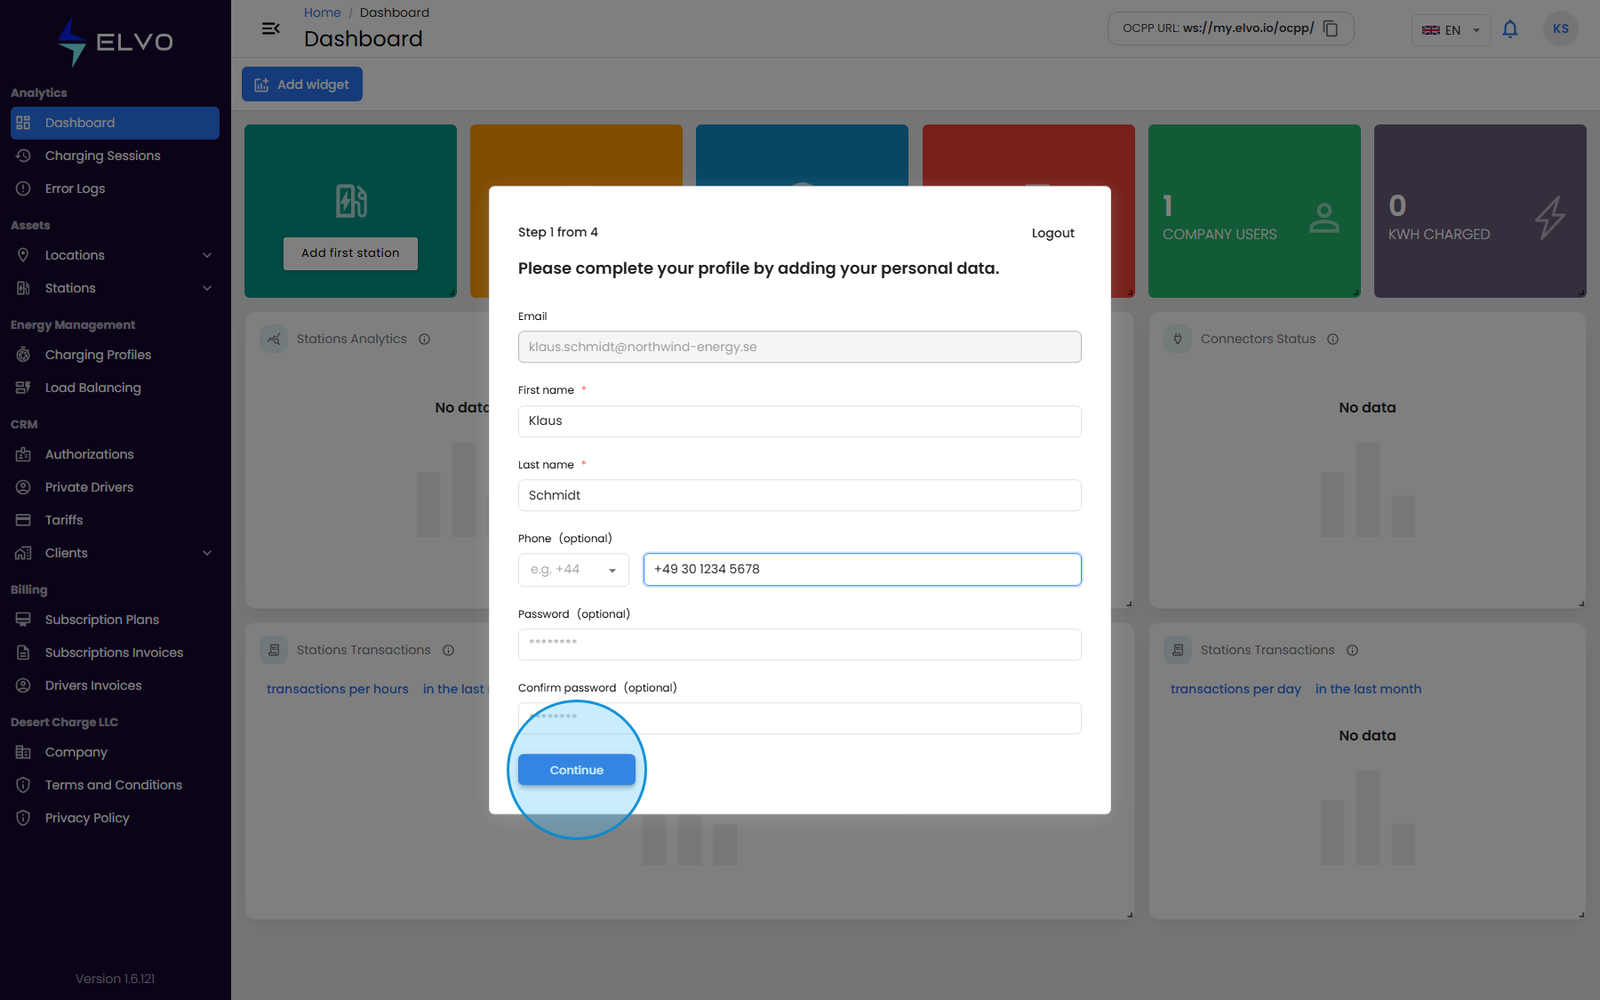
The wizard opens automatically the first time a self-registered account lands on the Dashboard. It runs in four steps (three when no self-service subscription plan is on offer) and shows a Step X from Y counter. You cannot close it; the only exits are completing the steps or the Logout link in its top-right corner. If you sign out midway, the wizard reopens at the first unfinished step next time you sign in. Steps 2 to 4 have a Back button.
Step 1 — Personal data
The step is titled Please complete your profile by adding your personal data. Your Email is shown but cannot be changed.
- Enter your First name and Last name (required) and, optionally, your Phone — a country-code selector followed by the number.
- Optionally set a Password and confirm it. If you set one, future sign-ins ask for the password instead of an email code (see section 19.3); if you leave both fields empty, you keep signing in with a code.
- Click Continue.
Step 2 — Company details
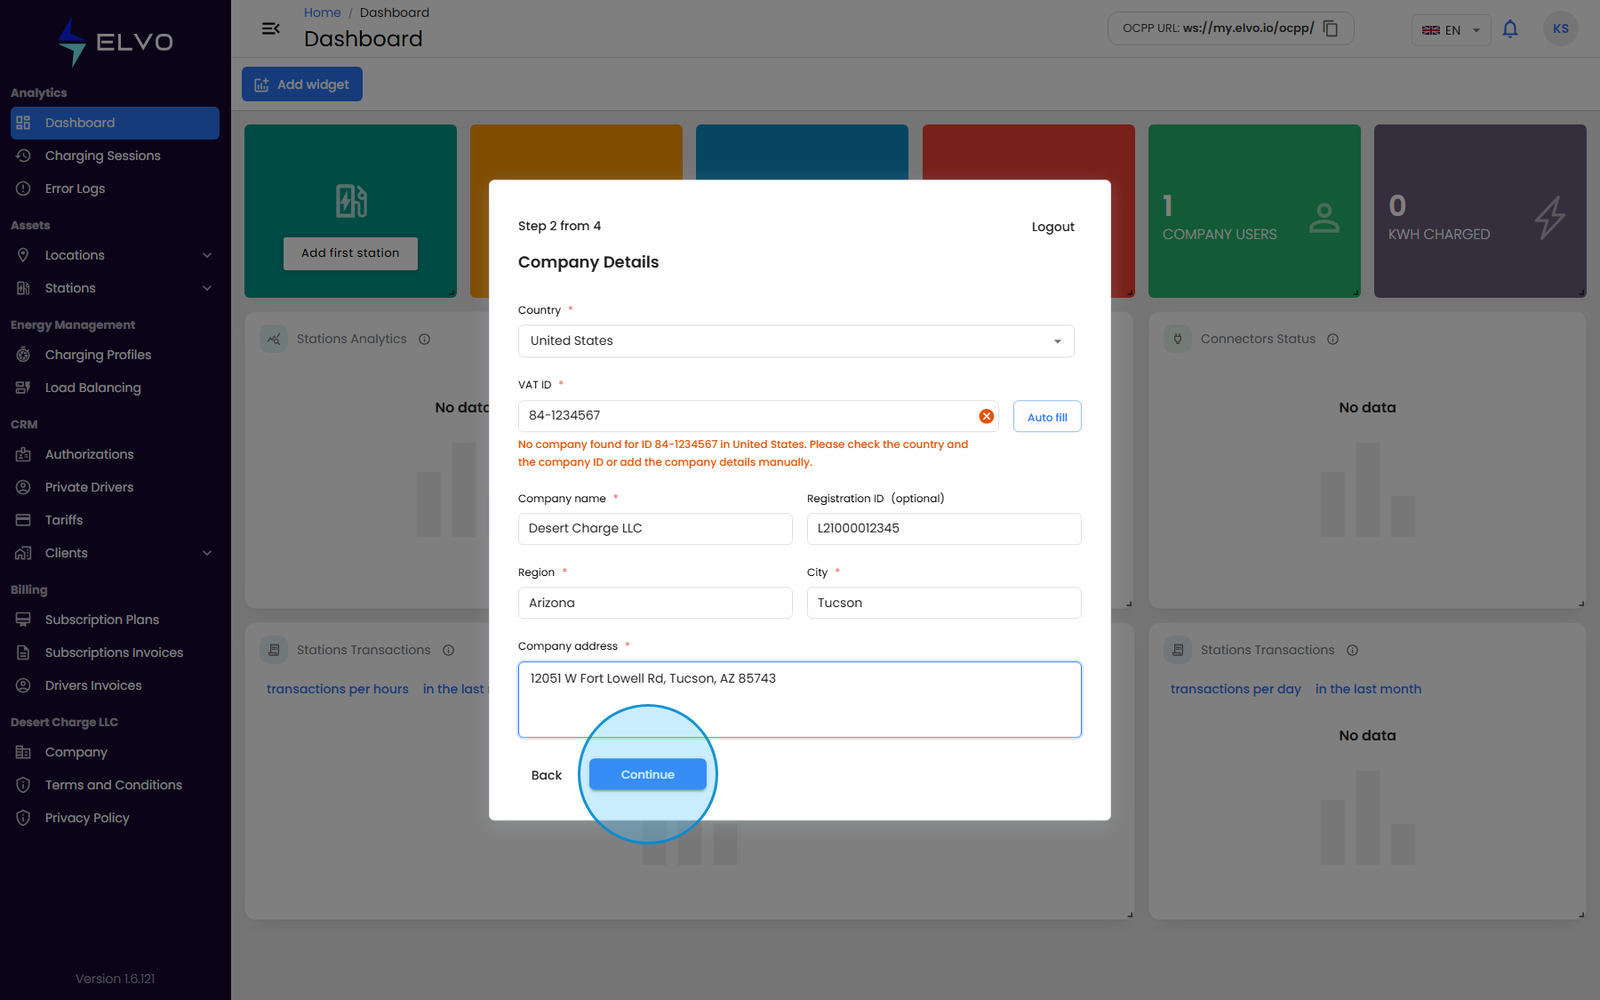
Every field except Registration ID is required. The form is the same one used for company clients and partners (see section 13.2), so it comes with the automatic company lookup described in section 16.5.
- Select your Country first (the field is preset to Romania) — the VAT lookup and the Region field depend on it.
- Enter your VAT ID and leave the field (or click Auto fill). For an EU VAT number, or a Romanian fiscal code, the platform looks the company up and fills in the Company name, Registration ID, Region, City and Company address for you; a green check mark appears in the field. Review the values and click Continue.
- Fill in any field the lookup left empty, then click Continue.
Entering the company details manually
The lookup only knows EU VAT numbers and Romanian fiscal codes. For any other identifier — a US EIN, a UK company number, a Swiss UID, and so on — or when the number is simply not found, the field shows an orange warning: No company found for ID … Please check the country and the company ID or add the company details manually. For a non-EU country a red notice such as Country code “US” is not a recognised EU VAT prefix also appears at the top of the page; close it with its X.
Neither message stops you. There is no separate “manual entry” mode — the fields below the warning are the manual entry. To continue:
- Keep your company identifier in VAT ID. The field is required,
but it accepts any value, so enter the identifier your company is
registered under (for example a US EIN such as
84-1234567). - Type the Company name, City and Company address yourself. Registration ID (the trade-register or state filing number) is optional.
- Fill in Region. For Romania this is a list of counties to pick
from; for every other country it is a plain text field — type your
state, province or region (for example
Arizona). - Click Continue.
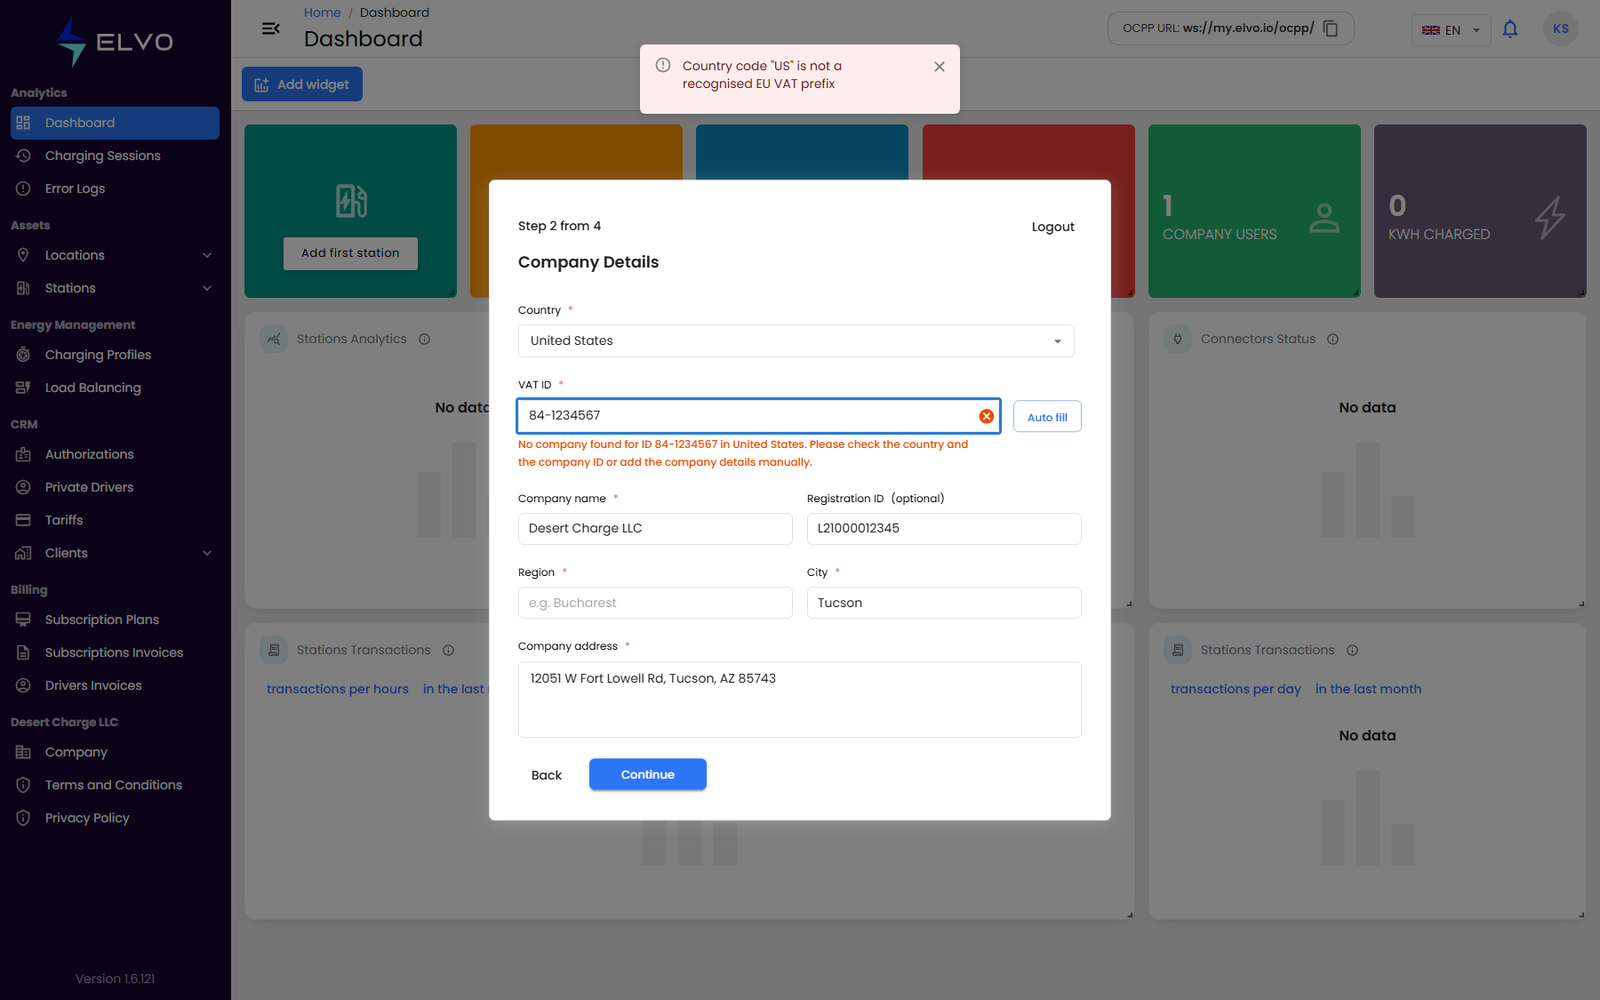
If Continue appears to do nothing, a required field is still empty: the form outlines it in red and does not move on until every required field — including Region — has a value.
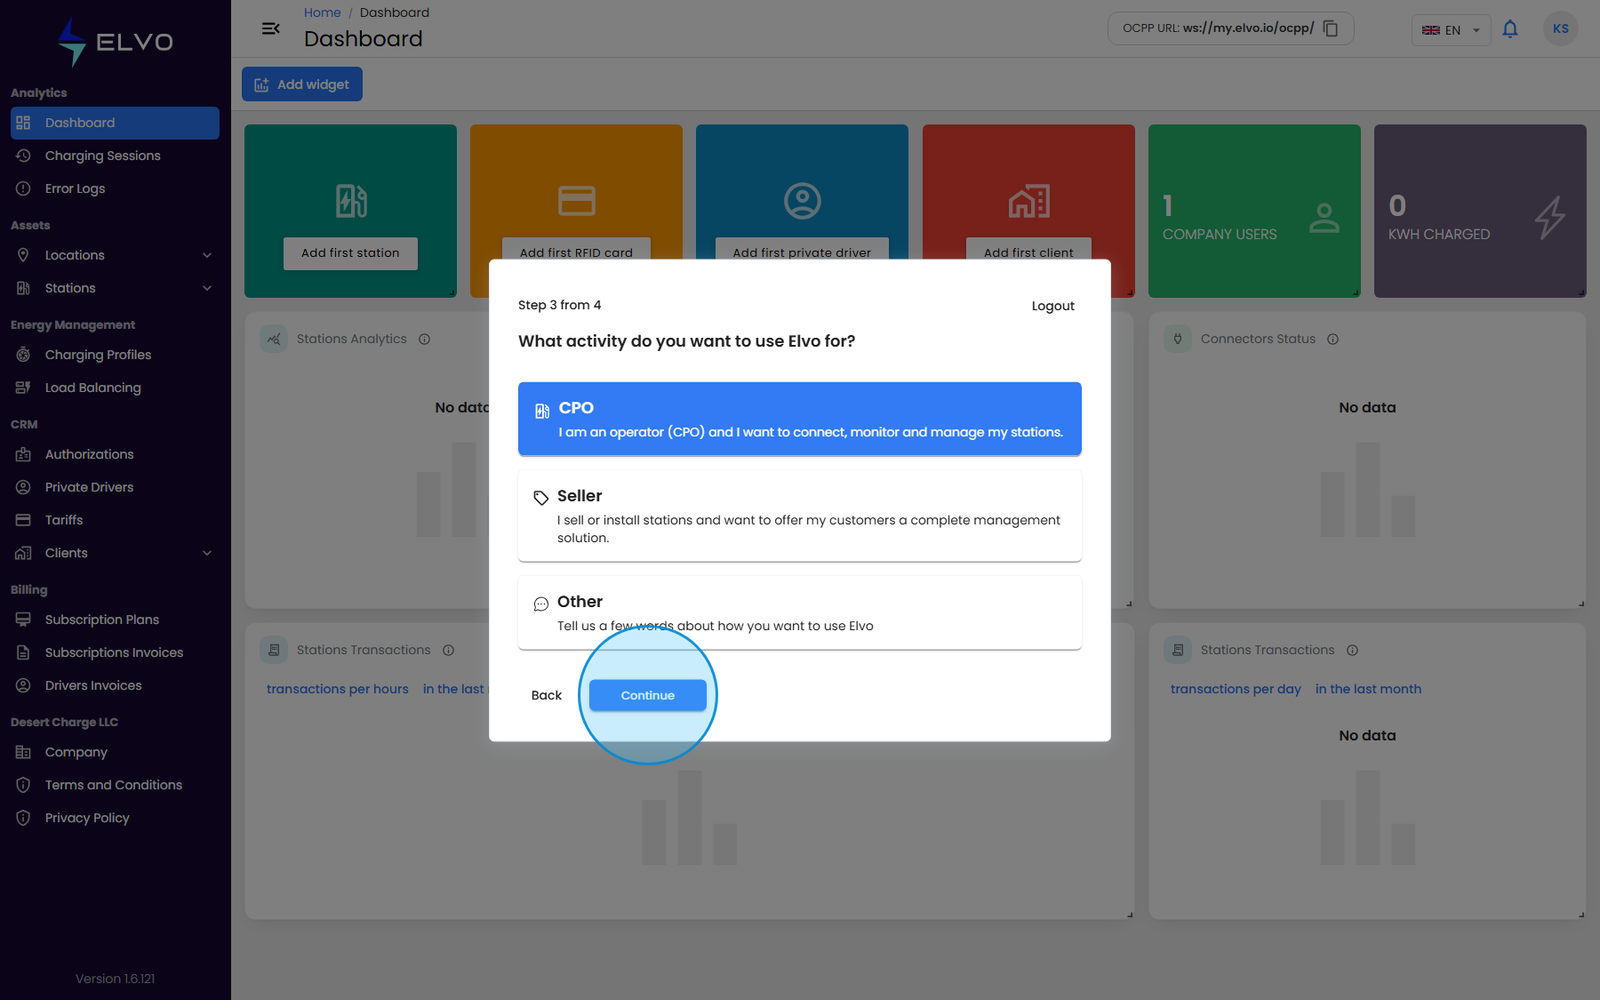
Step 3 — What activity do you want to use Elvo for?
Pick one card: CPO (you operate stations and want to connect, monitor and manage them), Seller (you sell or install stations and want to offer a management solution to your customers) or Other, which asks for a few words about your use case. Click Continue.
Step 4 — Choose your subscription
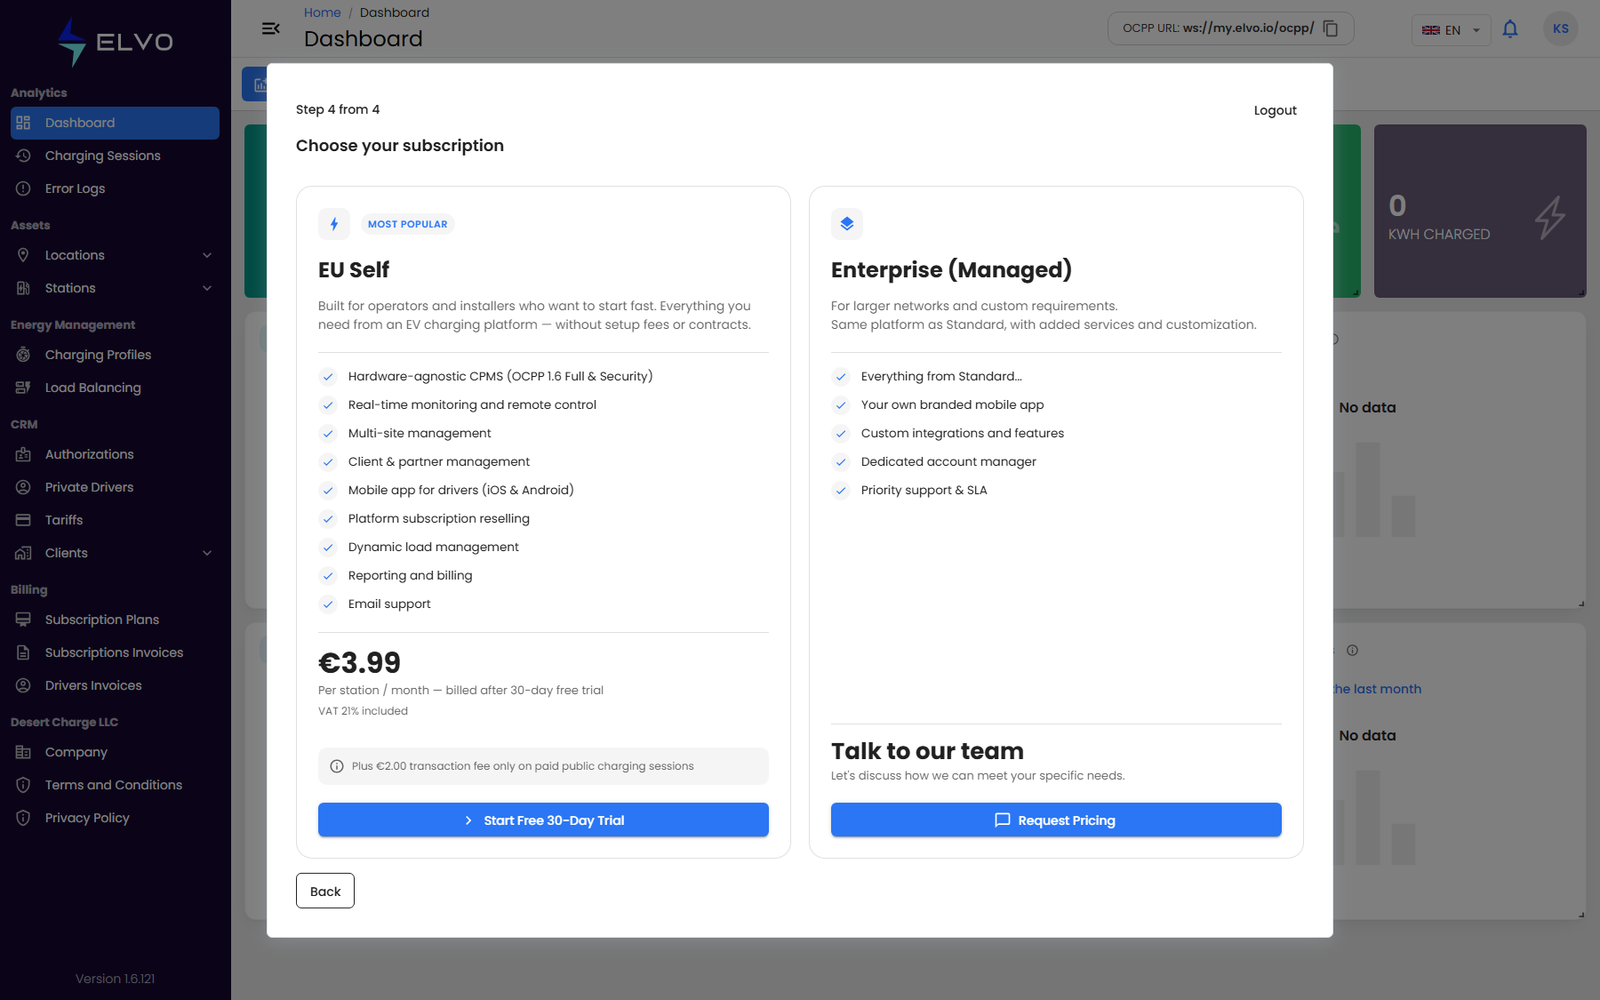
The last step lists the self-service subscription plans. Each card shows the monthly price per station or per connector, billed after a 30-day free trial, plus any transaction fee on paid charging sessions; the first card is marked MOST POPULAR. A separate Enterprise (Managed) card is for larger networks — its Request Pricing button opens the Elvo contact page in a new tab and does not change your account.
- Click Start Free 30-Day Trial on a plan to activate it. The platform confirms with Subscription plan activated successfully, closes the wizard and shows the Dashboard. You can change the plan later from Company → Subscription plan (section 16.4).
- The step has no skip button. If you are not ready to choose, use Back to review earlier steps or Logout; the wizard reopens at this step next time you sign in.
- When no self-service plan is available, this step is skipped and the wizard closes after step 3.
After the wizard: the Setup guide
Once the wizard closes, a Setup guide card stays on the Dashboard with a progress counter (N of 4 complete) and a Next: link to the next open item. Each item is a link to the page where you complete it:
- Choose a subscription plan — Company → Subscription plan (section 16.4); already done if you started a trial in step 4.
- Add a payment method — Company → Payment methods (section 16.1).
- Complete company details — Company → Company details (section 16.1).
- Complete billing details — Company → Billing Entity (section 16.3).
The card can be collapsed with the arrow in its corner. When all four items are done it shows You’re all set! for a few seconds and then disappears for good.
Older registration routes
Earlier versions offered dedicated registration pages for
Individual, Company and Partner accounts (under
/auth/register/...). Those routes now redirect to the login page — the
email step above is the single entry point (verified live 2026-07-16 on
v1.6.94 and again for this rewrite). Operators still register clients
from CRM → Clients (section 13.2) and partners from CRM → Partners
(section 14.2); the former public partner form is described in section
14.4.