Opening the control panel
In the sidebar, open Assets and select Stations to open the stations
control panel at /stations. The panel shows a table listing every station
visible at your tier, one row per station — the main entry point for
viewing, filtering, and onboarding stations.
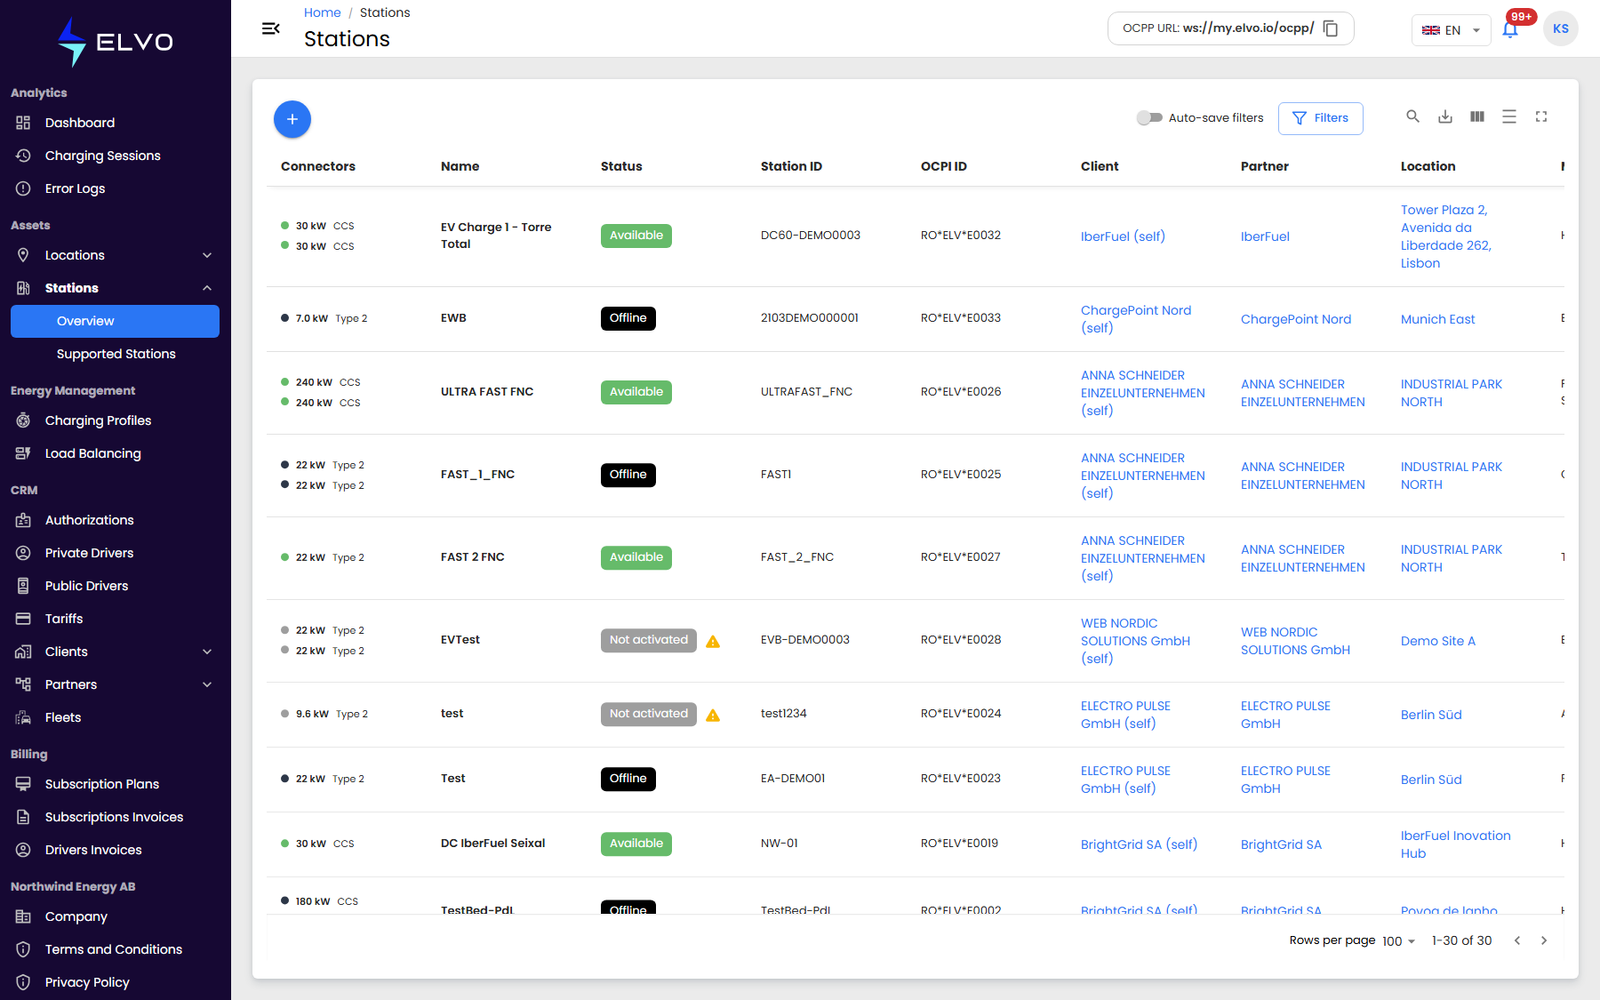
Each row summarizes a station’s connectors, name, status, Station ID and OCPI ID, its client and partner, its location, and its model; see section 4.5 for the full column reference, filtering, and sorting. The list is paginated, with the rows-per-page control at the bottom.
Clicking a station opens its full set of detail tabs (see Part 5), whatever its status — including a station that has not yet connected to the platform, whose connectors then read Not activated (see section 4.4).
If the list fails to load, the platform shows an error and leaves the table empty. If there are no stations to show, the table displays an empty message instead.
Adding stations
Click the + button at the top of the panel to open a chooser with two options.
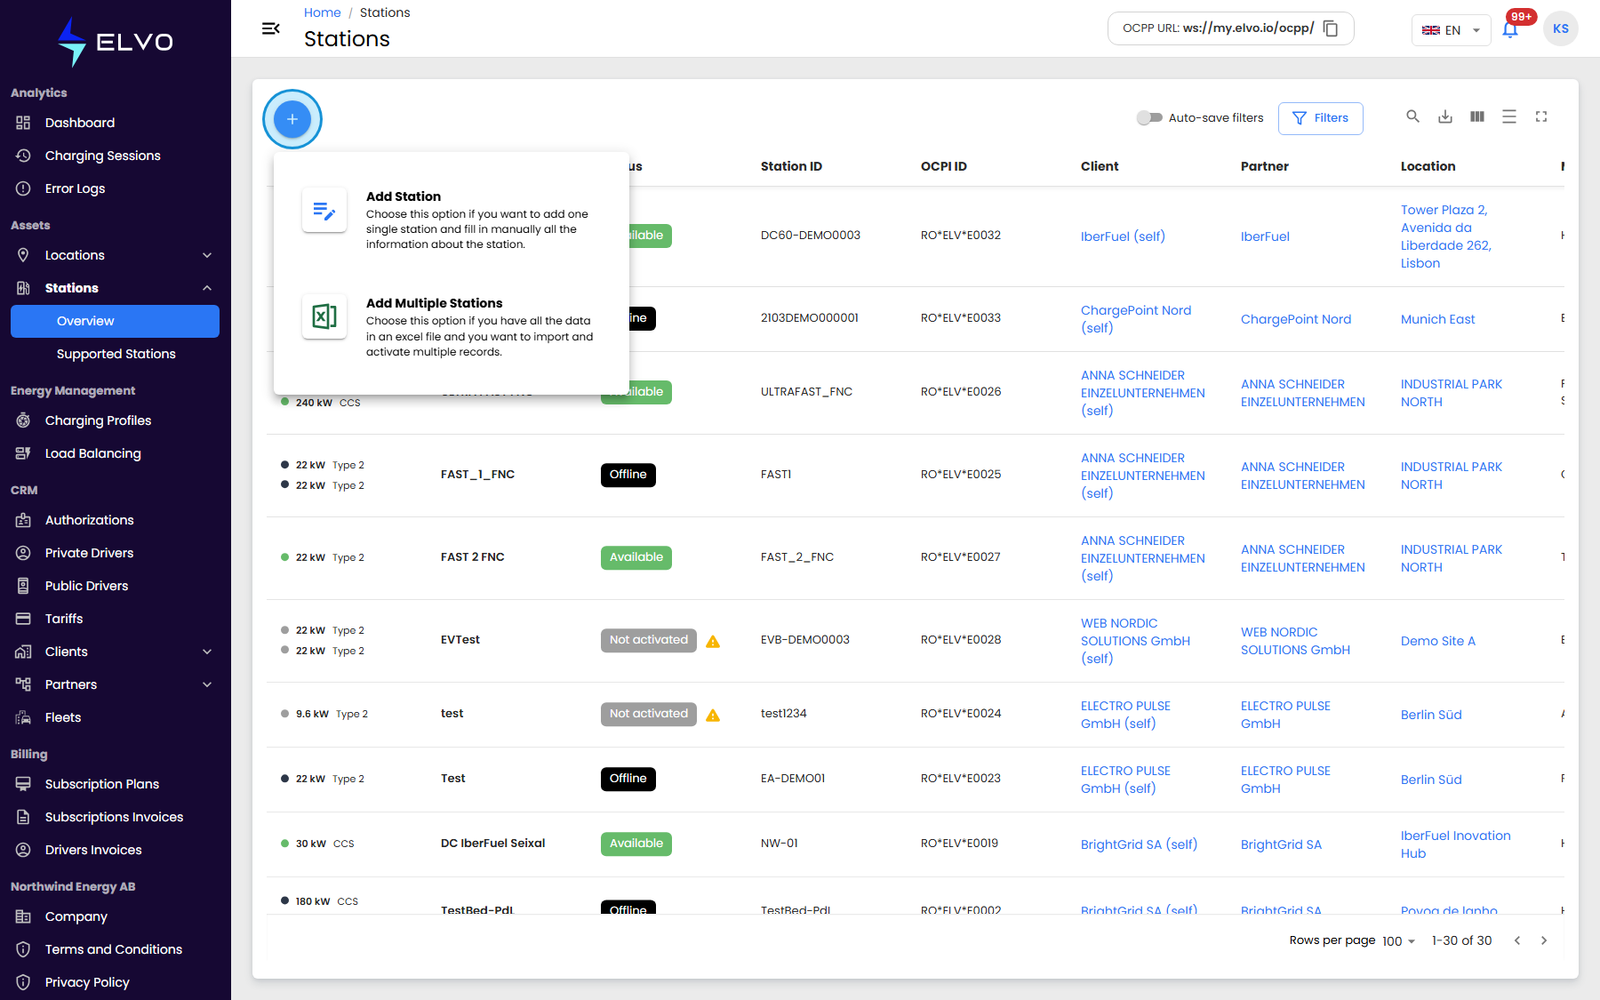
- Add Station — add one station and fill in its details manually, via
the 5-step wizard at
/stations/add-station(see section 4.2). - Add Multiple Stations — add several stations at once from an Excel
file, at
/stations/add-multiple-stations(see section 4.3).
Both paths register the station in the platform, and neither makes it usable on its own: a newly added station reads Not activated until the physical station connects to the platform itself. Section 4.4 covers that step.