Opening the filter row
Click Filters in the table toolbar to reveal a filter row directly under the column headers — each column gets its own filter control. A badge on the button shows how many filters are currently active, and the reset control next to it clears them all at once. By default the table opens showing the last week (the 1W quick range on the Date filter).
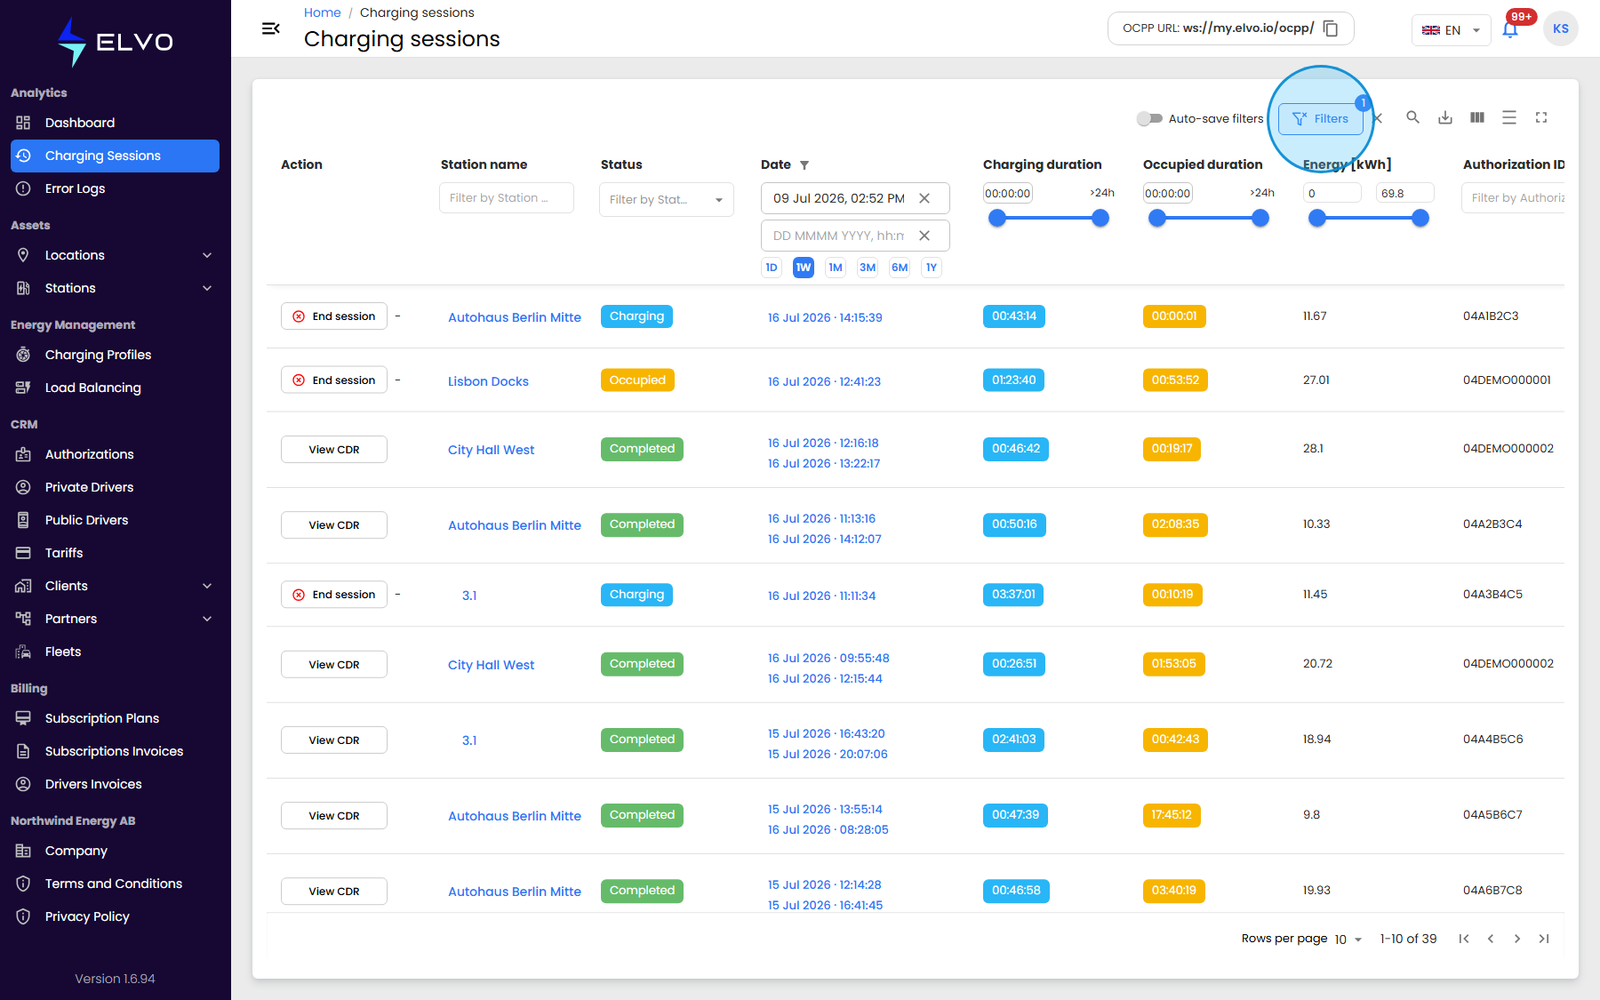
Text columns (for example Station name, Authorization ID, or Driver) filter as you type. Charging duration, Occupied duration, and Energy [kWh] use range sliders — set a minimum and a maximum to narrow the table.
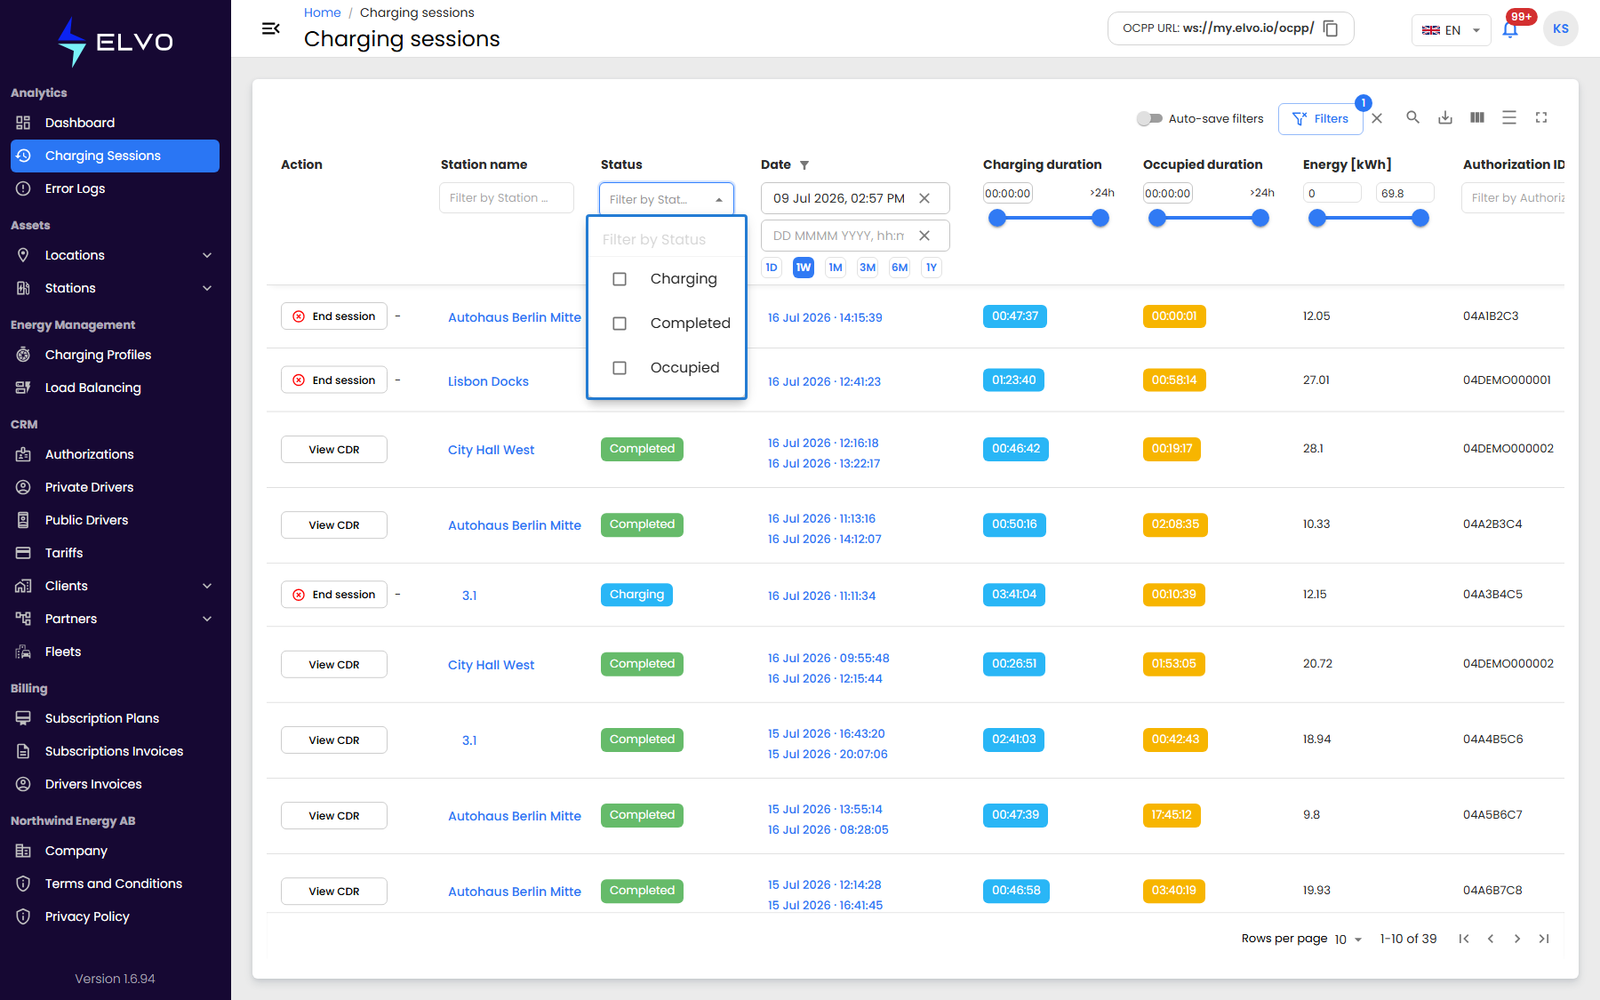
Filtering by status
The Status filter opens a checklist of session states — for example, check Completed to see only finished sessions (see section 2.1 for what each status means).
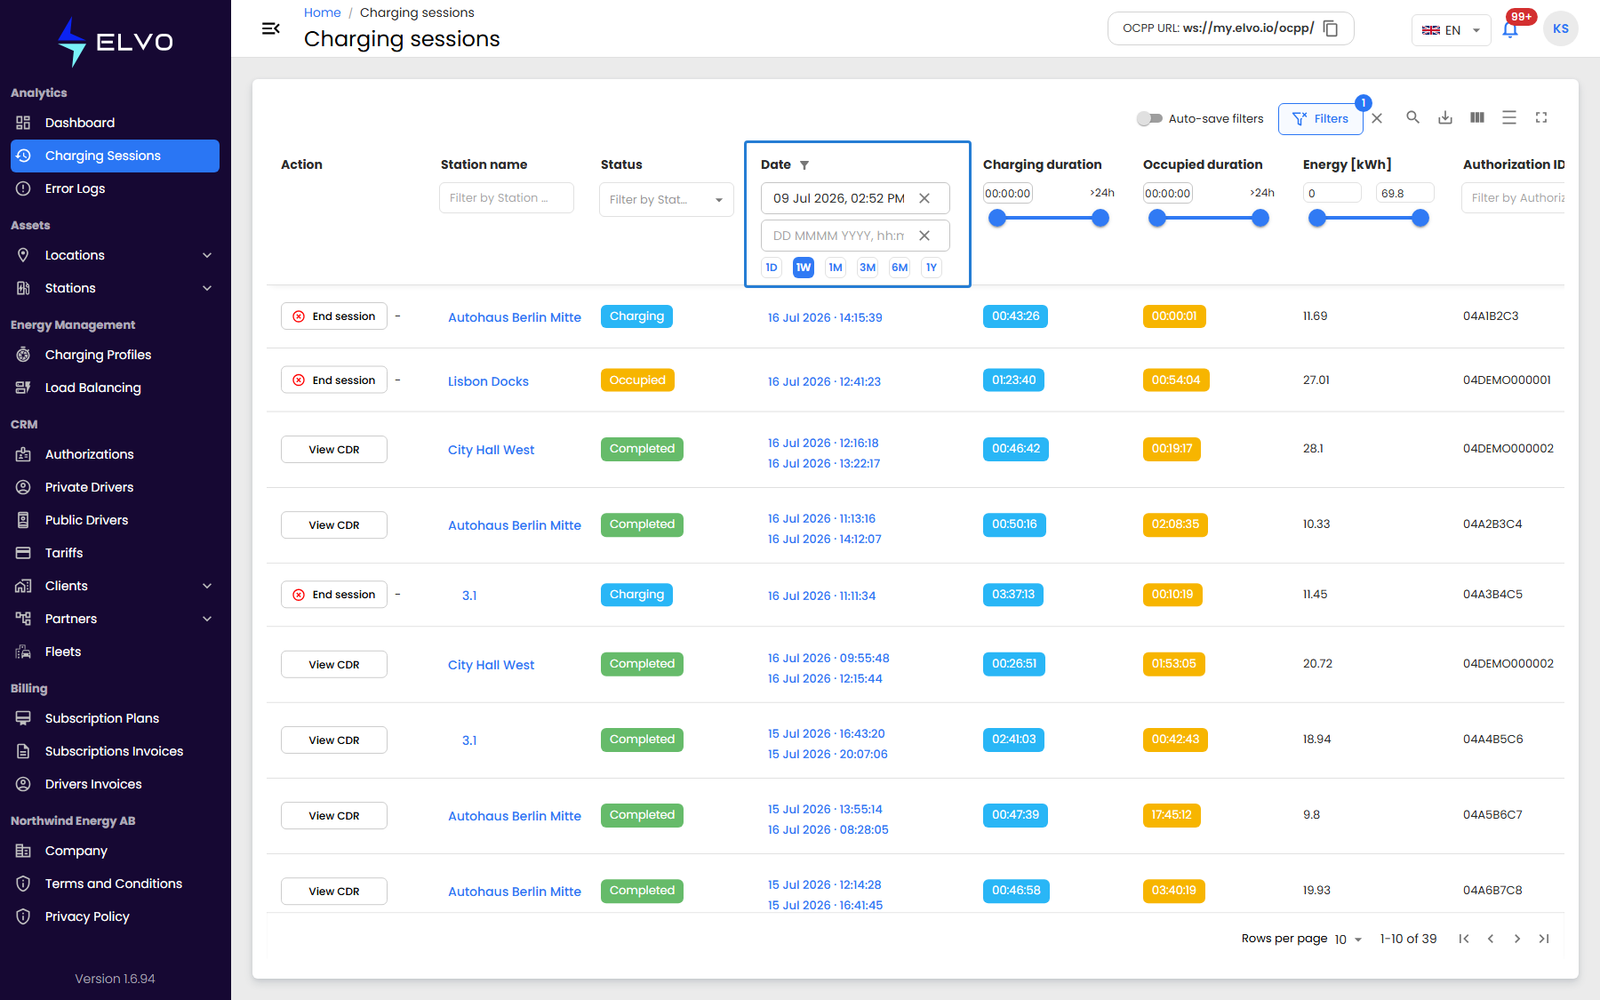
Filtering by date
Use the Date filter to narrow the table to a date range. Pick exact start and end dates, or use one of the quick-select ranges — 1D, 1W, 1M, 3M, 6M, 1Y — to jump to a common window.
Searching across all columns
A search box in the toolbar searches across every visible column at once — use it for a quick lookup instead of setting individual filters.
Saving your filter setup
Turn on Auto-save filters to keep your current filter selections the next time you open the Charging Sessions page. Turn it off if you would rather start from a clean set of filters each time.
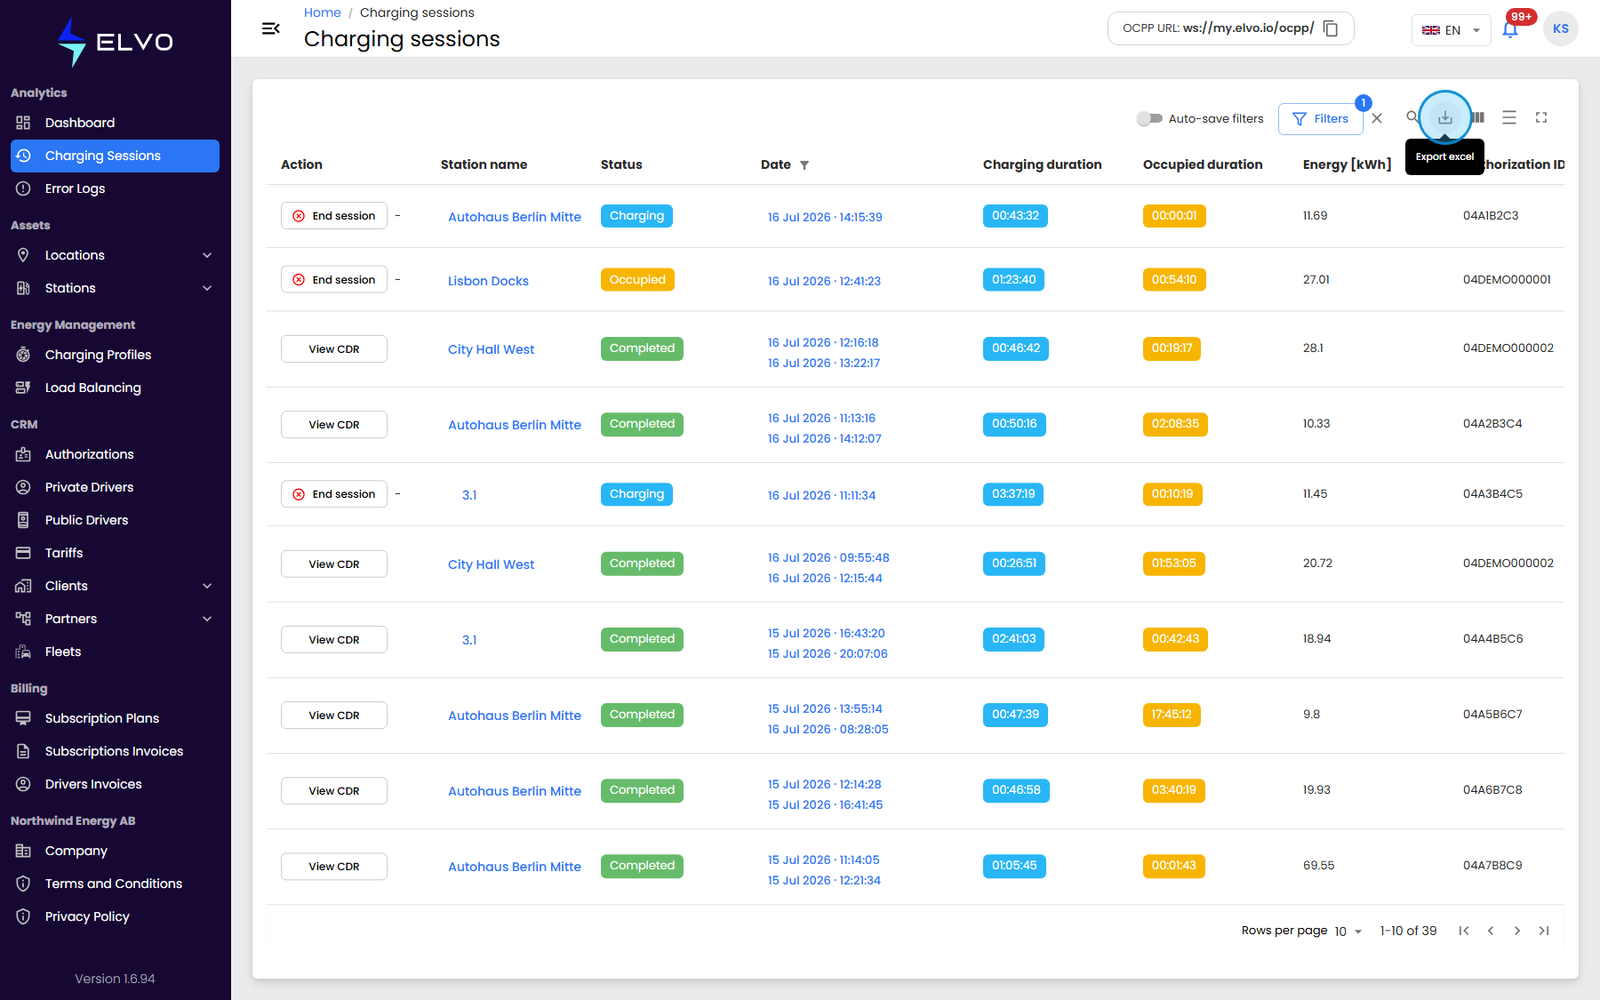
Exporting to Excel
Click the export icon in the top right of the toolbar (its tooltip reads Export excel) to download the sessions currently shown in the table as a spreadsheet. The export reflects your active filters — it downloads only the filtered rows, not your entire session history.