Opening the registration form
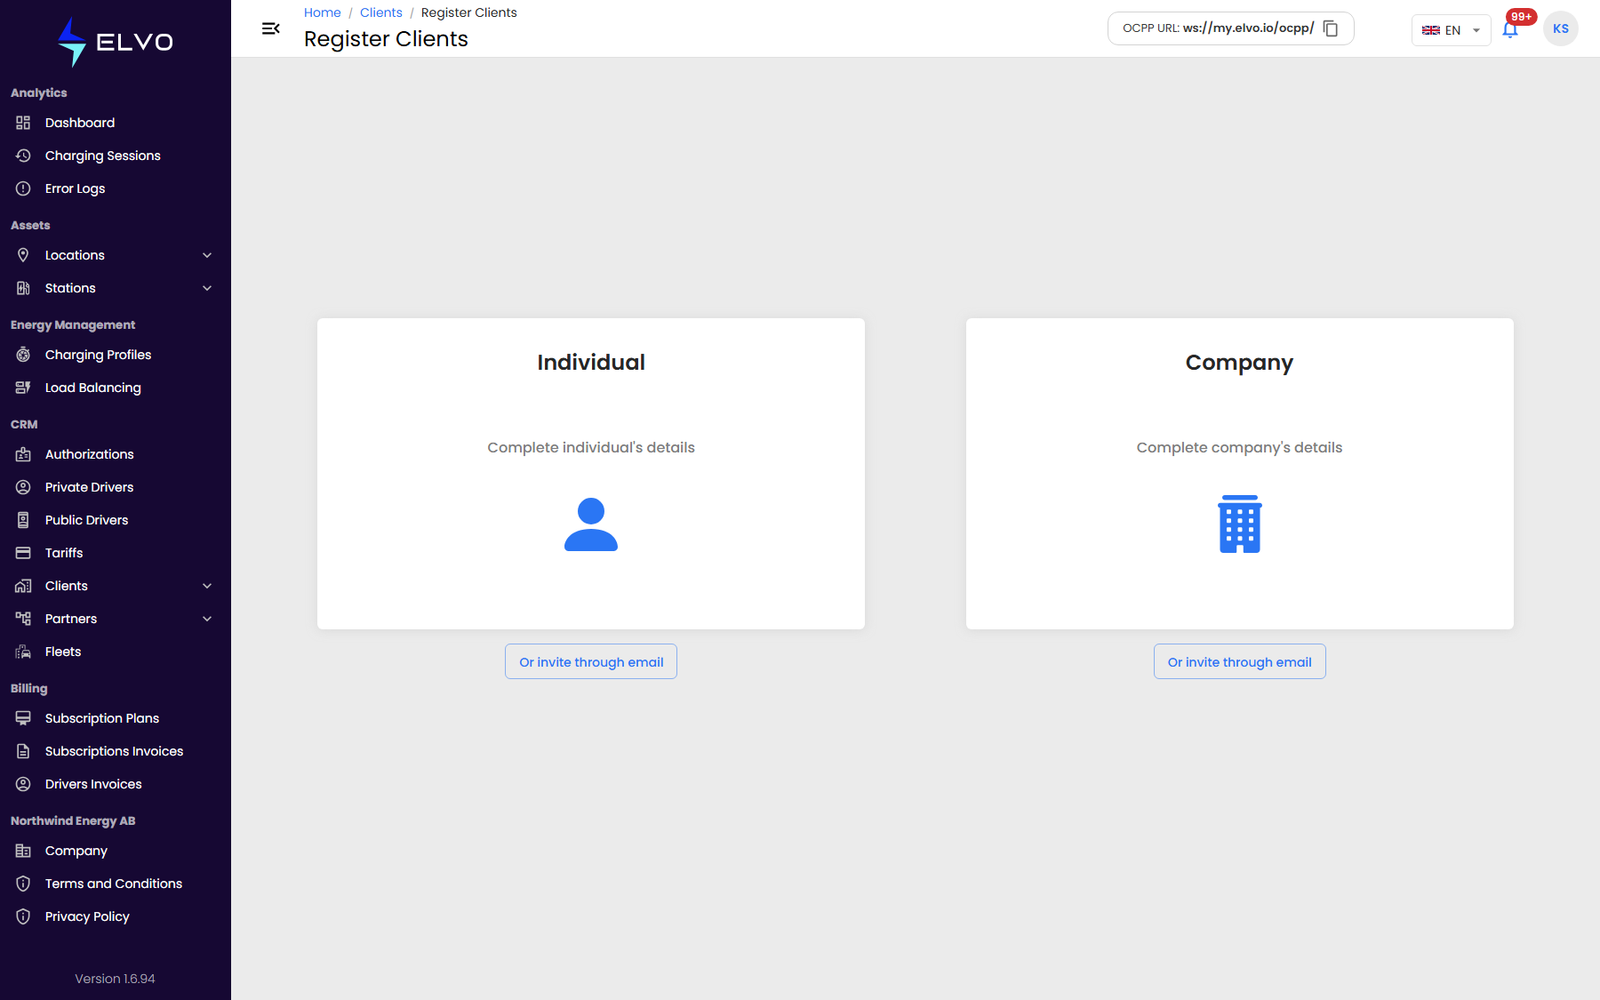
From the Clients list (section 13.1), click the + button. You can enter the client’s full details yourself, or send them an email invitation to complete their own registration instead (see “Inviting a client by email” below) — either way, you first choose whether the client is an Individual or a Company.
- {tier: enterprise} A Partner selector is the first field on both registration forms — pick the partner the new client belongs to.
- {tier: partner} New clients are automatically attached to your own partner account, so no partner selection is needed.
Registering an individual client
-
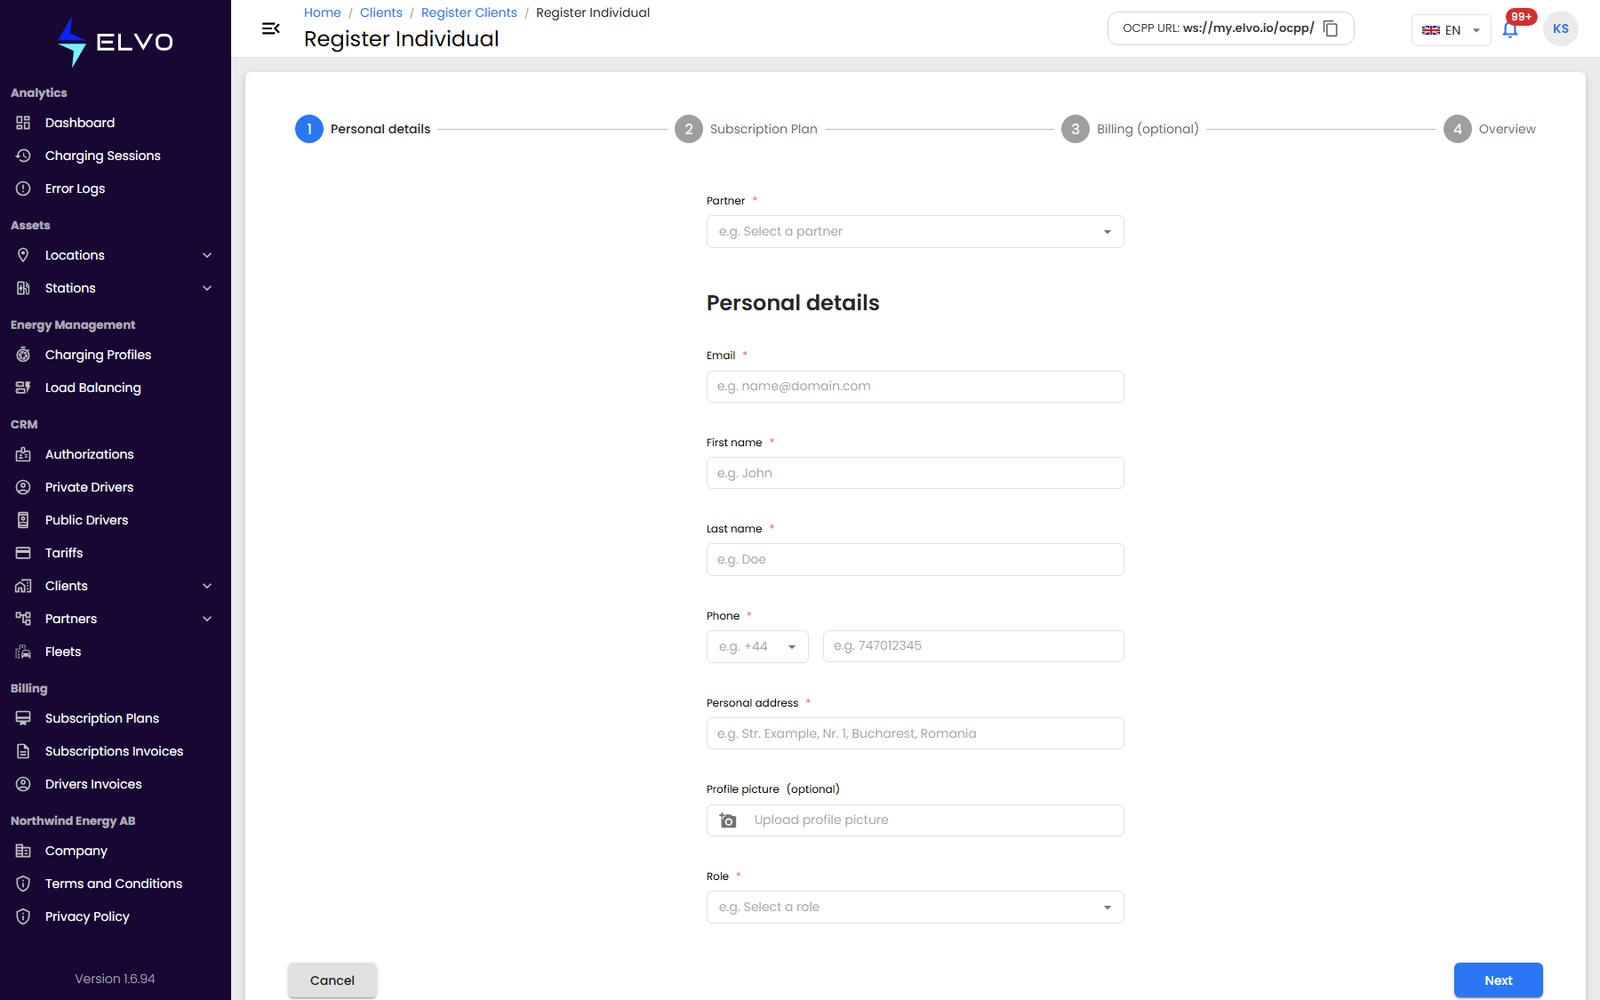
Fill in the first step: Partner ({tier: enterprise}), Email, First name, Last name, Phone (country prefix + number), Personal address, an optional Profile picture, and the user’s Role.
-
The next step asks for billing information — enter the client’s IBAN if you have it. Phone numbers and IBANs are validated as you type; an invalid phone or IBAN blocks you from continuing.
-
On the final step, either set a password for the new client account directly, or check the box to send an invitation email instead so the client sets their own password.
-
Click Save.
On success, the platform shows a confirmation toast and returns you to the Clients list with the new client’s row highlighted.
If the email is already registered, the platform shows an error instead of submitting. Every required field must be filled in, and an invalid phone or IBAN is flagged inline, before you can submit.
Registering a company client
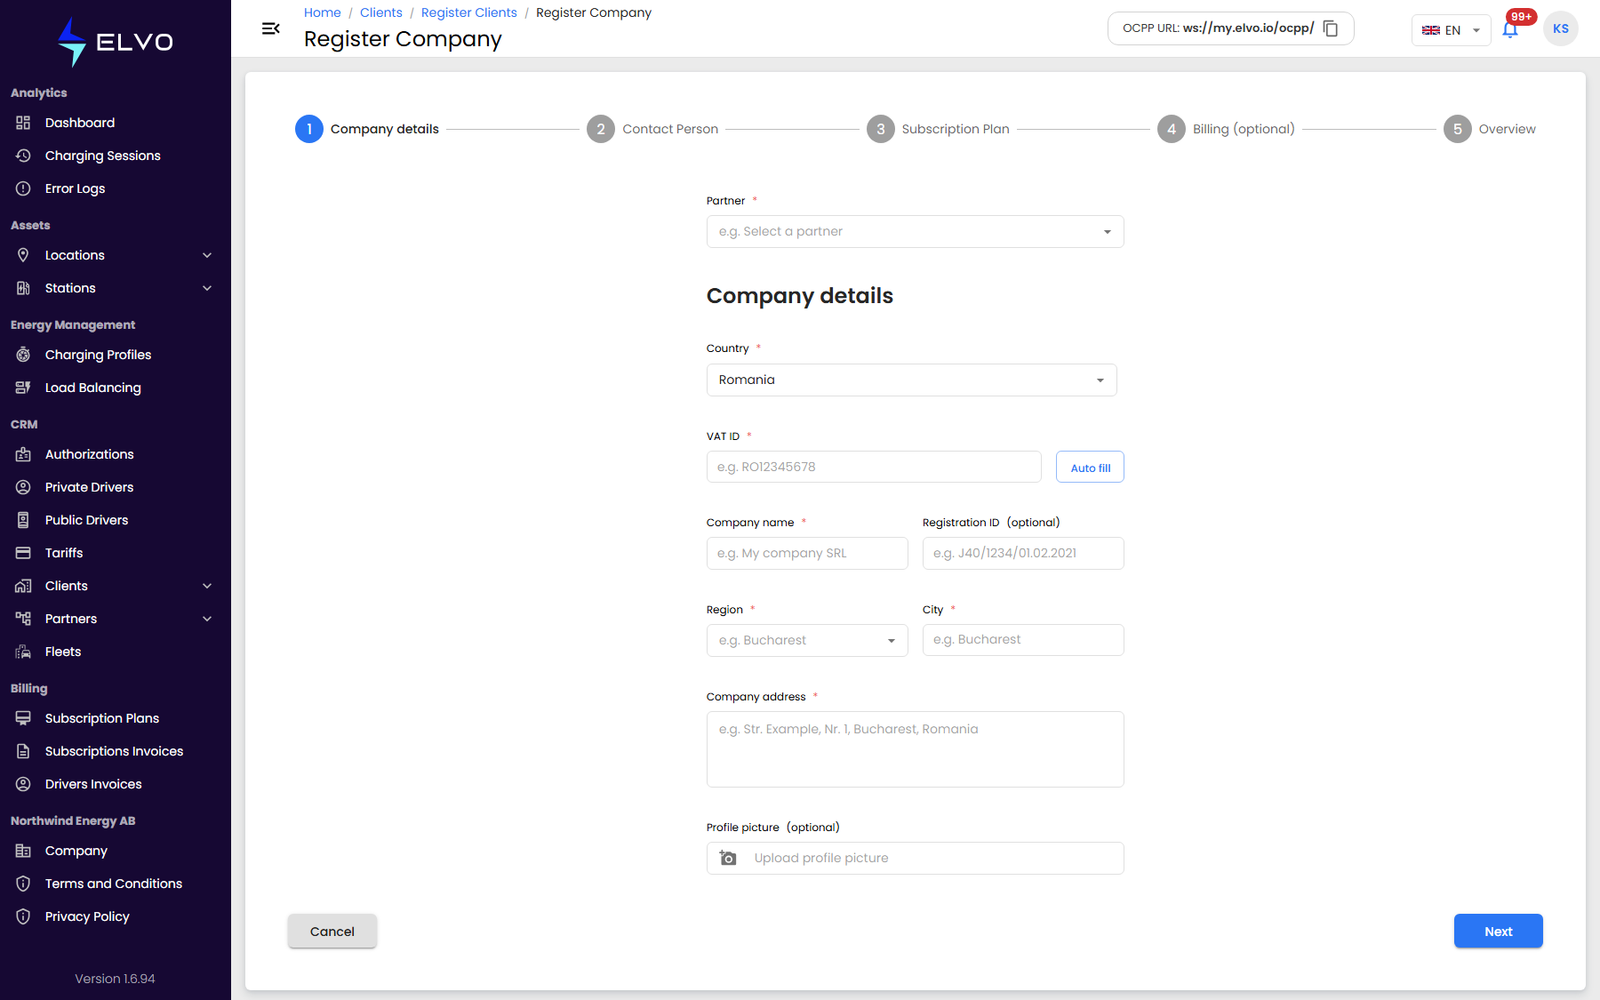
Company registration starts with the company’s own information — the first step’s fields, in order: Partner ({tier: enterprise}), Country, VAT ID (the fiscal code, e.g. RO12345678), Company name, Registration ID (optional trade registry number, e.g. J40/1234/01.02.2021), Region, City, Company address, and an optional Profile picture.
Entering the VAT ID looks up the company in the public registry and automatically fills in the company name and address fields. If the lookup fails, fill these fields in by hand (see section 16.5).
Click Save to submit. The same validation and unhappy paths described above for individual clients also apply here.
Inviting a client by email
Instead of entering the client’s details yourself, choose the Individual or Company invite option to send them an email invitation to complete their own registration.